How to make a
multi-signature campaign?
Learn how to do a multi-signatory campaign, or bulk electronic signatures, from the back office of the SELL&SIGN solution.
Create a multi-signature with SELL&SIGN
1. Choose the contract template
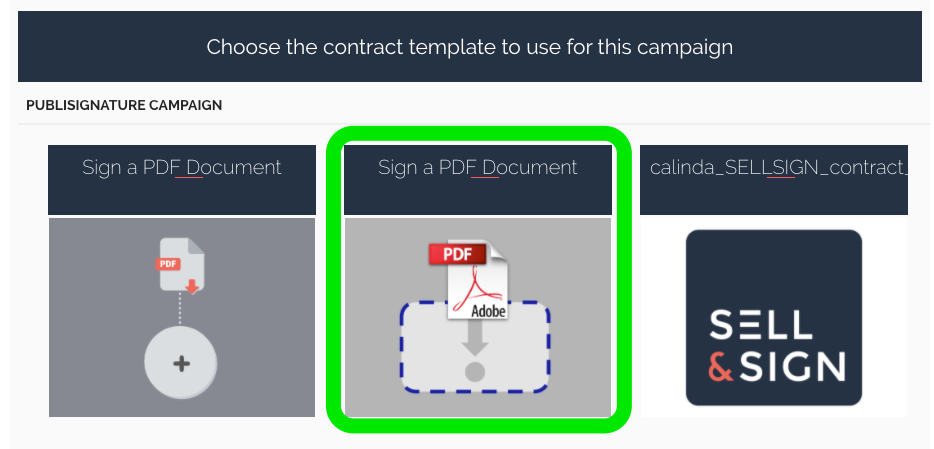
2. Upload the contract(s)
If you selected the template "Get a PDF document signed", you will be prompted to upload the document(s) to be used.
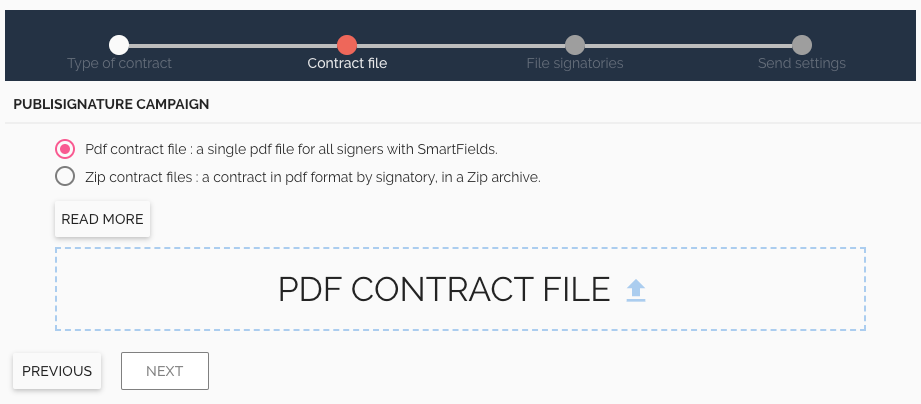
Two solutions are then available:
- All signatories use the same contract: Choose the first option "Upload contract in PDF" and upload the PDF file. You will use Smartfields to tell SELL&SIGN where to put the specific data for each signatory. If your contract includes Smartfield options, you can also provide their values for each signatory in the signatories CSV file.
- Each signatory must receive a different PDF document to sign: In this case choose the second option "Upload contract ZIP file" and load a ZIP archive containing all PDF files of the contracts. In the column, “pdfFilename” of the signatories’ CSV file (see next step), you will be able to indicate the name of the PDF document to be used for each signatory.
In both cases, you can load the file by dragging and dropping it onto the loading area, or by clicking on the area to select the file on your computer.
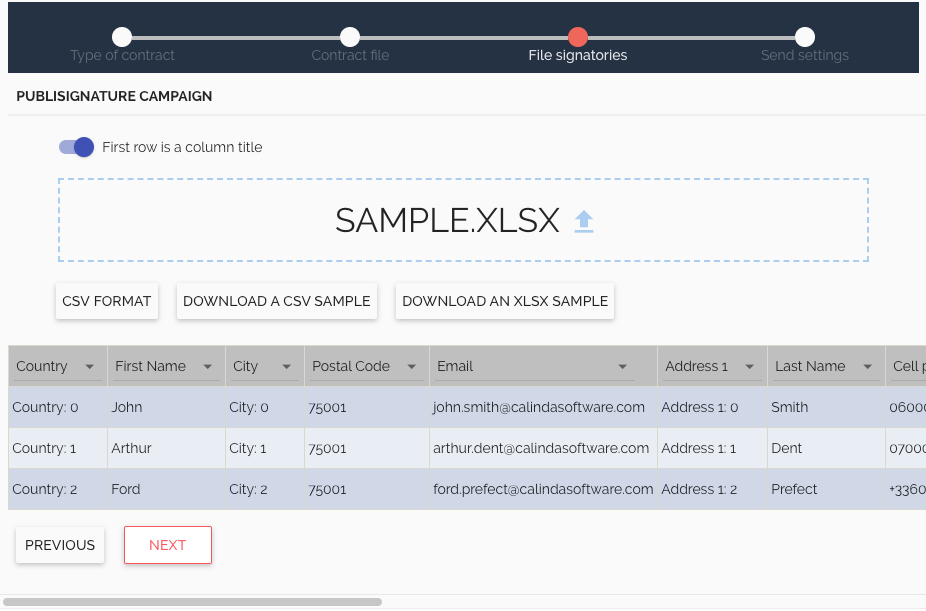
3. Upload the signatories
The signatories need to be uploaded on a CSV file (with comma-separated values). In this text file, each line corresponds to a signatory, and the values of each field should be separated by a comma (",").
The columns that can be included in the CSV:
- Standard fields of the customer or signatory (see the customer file of your license the standard smartfields). For example: Last name, First name, Email, Mobile phone...
- Customer custom fields that have been defined on your license. Example: CIP code
- Business data (defined via smartfields in your contract, or options in a contract template). For example: Social security number
- "pdfFilename": If you have a different PDF contract for each signatory grouped in a ZIP, this column should contain the file name to be used for each signatory.

The fields of your CSV depend on the configuration of your customer base in SELL&SIGN and the options or smartfields in your contract template. By clicking on the button "CSV FORMAT" you can get the list of possible fields in CSV format. This line can be used as a column title line if it is the first line of your CSV file, and if you select "First line is a column title".
You can also "DOWNLOAD AN EXAMPLE CSV FILE", which will be automatically adapted to your situation, to use it as a template to build your CSV file:
- Click "DOWNLOAD EXAMPLE CSV FILE"
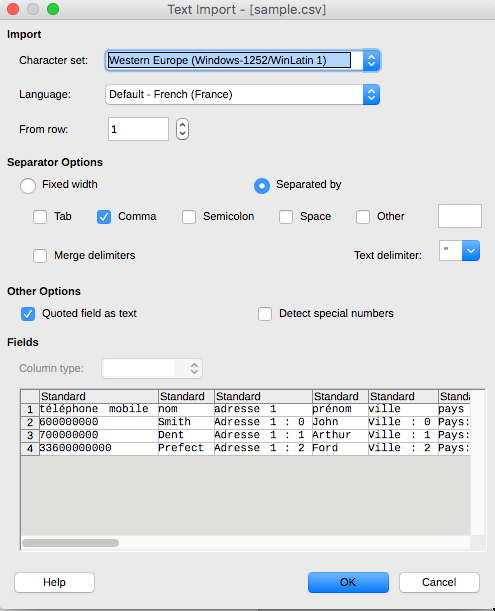
- Open the downloaded .csv file with LibreOffice (recommended) or Excel.
Note: If Excel does not open the file correctly, go to the "Data" tab then "From text". This will allow you to check the separators used and the encoding of the file. Consult the Excel documentation here.
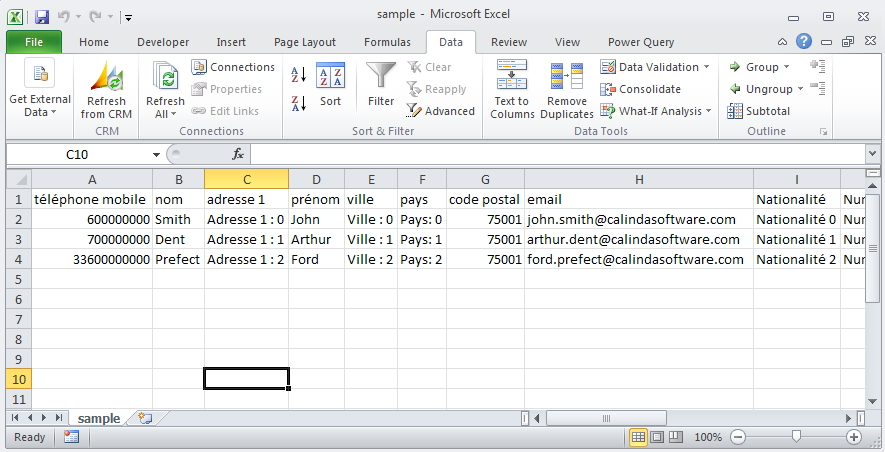
How do you build a CSV file?
From this example file, you can insert the data concerning your signatories in each column (in LIbreOffice / Excel ) or by separating them with commas (if you edit the .csv directly).
Note: when you save your CSV file, keep the default character encoding of your system (e.g. Cp1252 under Windows or UTF-8) since this is the one that SELL&SIGN will use to decode the file.
How do you upload your CSV file?
Once your CSV file has been created, upload it into SELL&SIGN by dragging it and dropping it into the loading area or by clicking on the area to upload if from your computer.
SELL&SIGN will then analyze your file and tell you if there are any inconsistencies in the file.
It will also display how it has interpreted the lines in your file so that you can check the consistency of your data. You will also be able to select which field each column in your file corresponds to (in the case that you did not use the same order as SELL&SIGN’s example file).
4. Launch a multi-signature campaign
That's it, your campaign's ready! SELL&SIGN will then show you a preview of the contract that will be prepared for the first signatory.
The last step is to decide how to launch your campaign:
- Send contracts automatically by email: All contracts will be sent directly to the signatories by email for remote signature.
- Manual sending: All contracts will be prepared in SELL&SIGN, and can be taken back for manual sending or signed face to face on a tablet. This will enable manual data modification.
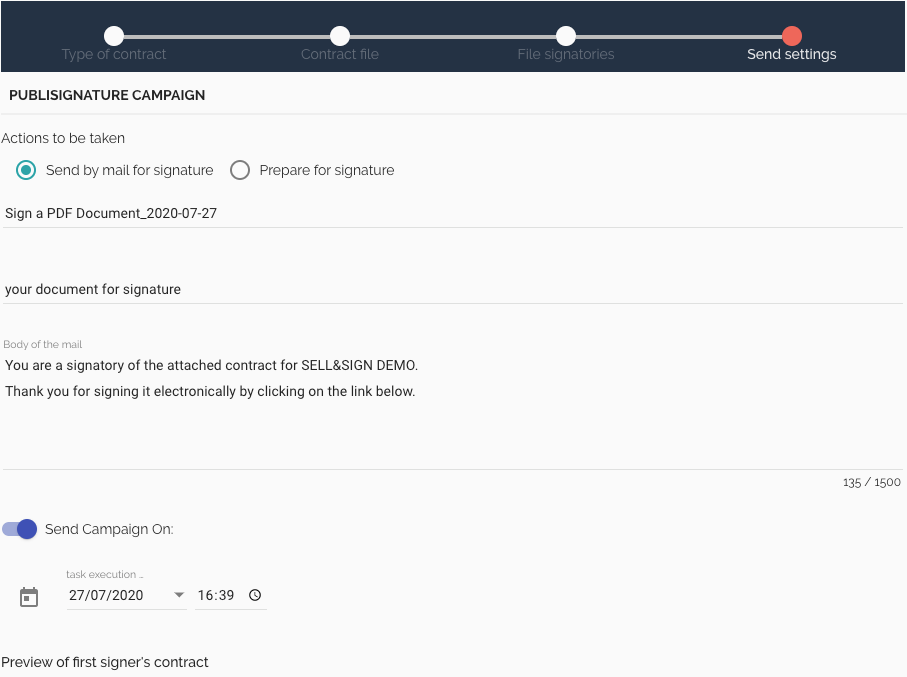
If you send your contracts by email for signature, you can modify the subject and body of the email and select a send date if you wish to schedule it for later on.
And there you go ! Click "VALIDATE".
The system will then prepare the campaign and show you the process of the emails being sent out.
You did it! And now you can follow the progress of your multi-signature campaign on the Campaigns page!
Track your multi-signature campaigns in the back office
The electronic multi-signature campaign dashboard allows you to track the execution of operations for current campaigns and retrieve the history of past campaigns.
You can access it directly from the “CONTRACTS” section of the SELL&SIGN backoffice by clicking on the "CAMPAIGNS" button.
In the "Action" column, you can view the details of the each campaign with the (i) button and see the list of all transactions that have been created in a campaign with the right button.
Useful feature: In SELL&SIGN’s backoffice you can follow-up with signatories in a single click! To do so, click on the "signatories" icon in the "Actions" column, and click "Restart" on the signatories to be re-contacted!
Conclusion
There you go! You can now save even more time with SELL&SIGN by preparing and publishing your automated multi-signature campaigns!

When needed, you can always contact the SELL&SIGN Support / Help Center. We are here to help you and answer any question you may have.
SHARE THIS ARTICLE